


I know, it should have never happened but I had waited until what seemed like the last minute to complete a rag quilt for my daughter’s bed that I saw on Pinterest.
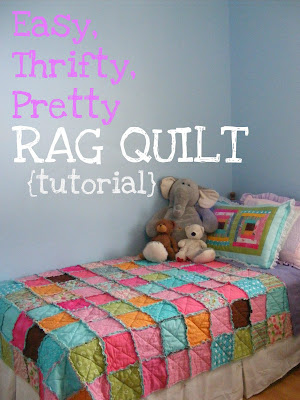 |
| Easy Thrifty, Pretty Rag Quilt Tutorial on The Complete Guide to Imperfect Homemaking |
Doesn’t it look cute? Not to mention bright and cheery? From reading Kelly’s post, it sounded easy to make this quilt. I mean, what did I know–I’ve never made a quilt before. I found some material at Hobby Lobby to match my daughters’ baby quilts made by their grandma, added a few filler colors and cut out the quilt pieces. So far so good.
Next I cut out the batting, the 100% cotton batting, which as I learned from the Hobby Lobby specialist, is the batting of most professional quilters. Did I mention that I am NOT a professional quilter?
But alas, I digress. Next, I began sewing the pieces together. Knowing that the pieces didn’t have to be put together perfectly I didn’t stress much until the tension on my sewing machine would not cooperate. Square after square began to have little bunches of fabric. I kept sewing and ripping seams and sewing and ripping seams until I realized that I had slightly misfed the thread on the machine. Yes, I am definitely not a professional quilter.

Once the squares were finished, it was time for the fun part–laying the pieces out to create a pattern for the quilt. In this case, since the dimensions were such odd numbers, I decided to go with a repetitive pattern making it easy to piece together.
Now before I go any farther I should mention I skipped step 4. What is step 4 exactly? Well step 4 is where Kelly suggests going back and making the squares square with a rotary cutter. I didn’t want to take the time to do this because I thought to myself, what did it matter if the edges were precise? After all, they were going to be cut to make RAG quilt anyway. Note to self in the future: never skip a step. It’s not worth it. There’s a reason for that step.
 Next, I began to sew the pieces together. I was amazed at how fast this step went. Zoom. I was done…which meant it was time for the snipping. Oh the snipping. I did not like the snipping. It took for..ev…er. I should have read this step better when Kelly said to sit down to a “few short movies.” No joke. I realized, though, after watching one movie I had better concentrate more on what I was doing because I was having one MAJOR problem. I kept snipping the seams. I’d snip. The seam would unravel. I’d sew it up. I’d snip. The seam would unravel. I’d sew it up.
Seriously, I cannot tell you how many times I did this…a hundred maybe? It was awful. AWFUL. When I was completely done I laid the quilt out to see if I needed to do anymore patchwork and I’d find 10 or 20 MORE holes.
Then I washed it. More holes. It was a disaster. If it wasn’t one of my daughter’s few Christmas presents I might have tossed it in the trash can. It looked like a wreck. Finally at 10:04 p.m. on Saturday night, December 22nd, I had had it. I couldn’t take it anymore. I had worked so hard. I had poured my heart into this quilt. I had sewed. I had labored. I had given hours upon hours to complete this project and it just wasn’t turning out like I wanted it too. I wanted to cry and cry and just let it all go.
 It was then that I realized something very special I never would have thought about if it were not for the quilt. I am like that quilt. Me. Kathy. God sees me for who I am. Holes and all. He sees what I can become…despite when I skip a step. He loves me for me. He never gives up on me no matter how many holes I put in my life because I’m just trying to get it done quickly. He is always there to patch it up and make my life better than new or “white as snow.” Jesus endured all those frustrating snips in my life so that when I am presented to God on that fateful day I will appear more beautiful and faultless than any quilt made by even the best professional quilter. God is my master quilter who has the patience, knowledge, love, and perseverance to create me into His design despite my own shortcomings. Isn’t that amazing?
And to think, if I had never had such a horrendous time with that quilt I would have never had that very special God-moment. As for the quilt, how did it turn out?

Well, I definitely don’t want a professional quilter to inspect my work but Peanut was very happy to have her first quilt for her big-girl bed. She loves it and sleeps with it every night. And every day as I see her bed, I am reminded that just like that quilt, I am not perfect, but I know a master quilter who is. Thank God.
Notes about the quilt:
- This quilt was made using Kelly’s tutorial, which is excellent by the way, especially if you follow ALL the steps.
- I made the quilt 11 squares by 13 squares which lets the quilt hang down 2 squares on either side of a twin bed. If I make one again, I think I will try to make it 11 squares by 15 squares so that the quilt is long enough to hang down two squares at the foot and then reach to the top of the bed. As it is, Peanut’s quilt only hangs down one square at the foot and does not quite reach the headboard lying flat.
- Be prepared, you will need three rolls of thread for this project…well maybe two, provided you don’t have to rip as many seams out as I did. And let’s pray you don’t because besides that it really was a very easy quilt to put together.

